CALAMITOUS CORRIDORS
A downloadable game for Windows, macOS, Linux, and Android
ABOUT
A corridor runner.
CONTROLS
- IN GAME
- Joystick Left-Right for corridor positioning, defaults middle position.
- NB: Player auto-runs.
- ON TITLE SCREEN
- Joystick Left-Right to set start recommence Checkpoint ( setting 1 is Checkpoint #8, the highest/easiest loop on the map).
- Joystick Button to start game.
- ON MAP SCREEN
- Joystick Button to resume game.
- ON FALL SCREEN
- Joystick Left-Right to
- avoid debris.
- collect Health Packets.
- avoid debris.
- Joystick Button to resume game, once landed.
- Joystick Left-Right to
- ON INFO SCREEN
- Joystick Button to resume game.
- Joystick Button to resume game.
- RESTART
- Joystick Button when on Info Screen (and it’s game over), or
Reset Switch
- Joystick Button when on Info Screen (and it’s game over), or
UI
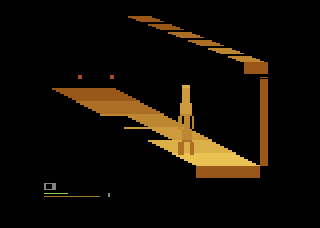
In game, as seen below the corridor, the current level number alerts either red or green. It depends lane closure, and whether the player has struck a gap. Stripes register across the player to relay this information.
Two bars beneath the number show progress and stamina.
LAYOUT
Transition corridors via stairs.
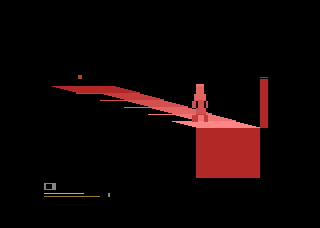
Camera angles & colours swap.
LANES
Each corridor is divided into invisible lanes.
At the far end of a corridor, lane closure lights are represented by red dots. They warn against running over gaps.
Lanes comprise left, middle and right for the player to run in.

Image: 3 lanes closed
PROGRESS and STAMINA
Two bars beneath the UI's level number show progress and stamina.
The top bar, Progress, increases on each successful colour sequenced transit of a corridor's layout.
The lower bar Stamina:
- decreases on excessive Joystick Left and Right activity (so avoid rapid left-right flicking, and avoid holding down too long either left or right).
- decreases or increases depending if the UI number has flashed red or green, denoting a gap encountered and whether its associated lane was closed or opened.
SPEED
The player runs a little quicker along a corridor when connected their progress.
MAP
Map Screen locates the player within the establishment. It shows whenever a new checkpoint has been reached. The map renders parallel textured paths angled upwards. There is a vertical centre line delineating two checkpoints per floor, left and right. In series, checkpoints commence #0 base left to end #9 top right.
LEVELS
Jumping from the final Checkpoint, located on the highest floor (positioned top right on the Map Screen), and successfully completing the Fall Screen, adds one more to your level of obtainment. There are 10 levels in Calamitous Corridors, numbered 0 to 9 (see UI, INFO).
FALLING
After reaching Checkpoint #9, the player falls until Checkpoint #0†
During this stage, move Joystick Left-Right to avoid debris, which removes stamina upon contact. Collect Health Packets fluttering up the screen for additional stamina.
Click Joystick Button once landed to enter Info Screen.
† when hardness is set to 1 or 2 on the Title Screen, the player recommences on a higher checkpoint on the map.
INFO
The Info Screen appears since
- game over, either due winning or losing, or
- completing the Fall Screen
Use Joystick Button to continue.
If arriving the Info Screen with no stamina remaining (lose condition), or you have already obtained level 9 prior to falling (win condition), then only the Title Screen presents next. Else, resume running corridors.
HARDNESS
The game increases in difficulty through three key ways:
- progressively increasing speed of running when transiting corridors (see LAYOUT).
- losing 1 additional stamina unit when crossing a closed lane's gap. This occurs below Checkpoint #4 (see MAP).
- every step-level progression (3-6-9), the corridor's distance is cloaked by a shaded section's length (see LEVELS).
LOSE
Info Screen appears with level obtained and some special music plays.
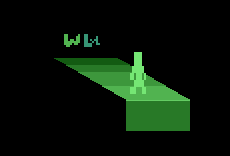
WIN
Info Screen appears. The platform's colours roll forward and 'W' shows.
Player must have completed the final Fall Screen with any stamina remaining. They have completed all the levels. They regret at least one of their life decisions up to this point.
Download
Install instructions
Use this file with an Atari emulator (available all platforms when accessed online).
In most cases, when burned to ROM (i.e., a physical cartridge), the supplied binary will work with an original Atari 2600 and 2600+.
NTSC
Development log
- CALAMITOUS CORRIDORS released56 days ago
- CALAMITOUS CORRIDORS - WIP - 13_1459 days ago
- CALAMITOUS CORRIDORS - WIP - 1265 days ago
- CALAMITOUS CORRIDORS - WIP - 1169 days ago
- CALAMITOUS CORRIDORS - WIP - 1073 days ago
- CALAMITOUS CORRIDORS - WIP - 0976 days ago
- CALAMITOUS CORRIDORS - WIP - 0880 days ago
- CALAMITOUS CORRIDORS - WIP - BOSS IDEA85 days ago